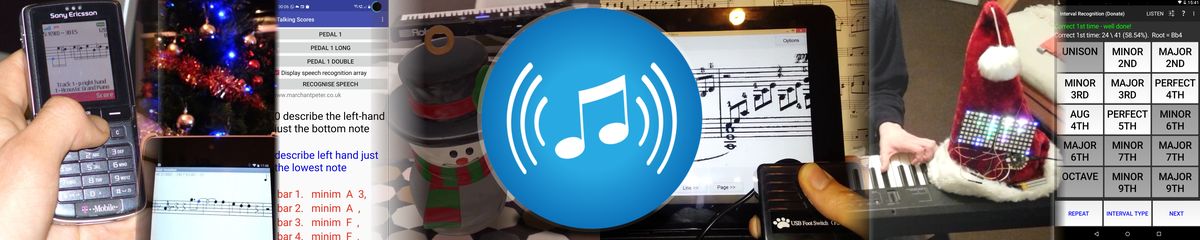
Arduino Bluetooth MIDI - external box and electronics
Left side with 4x MIDI jacks
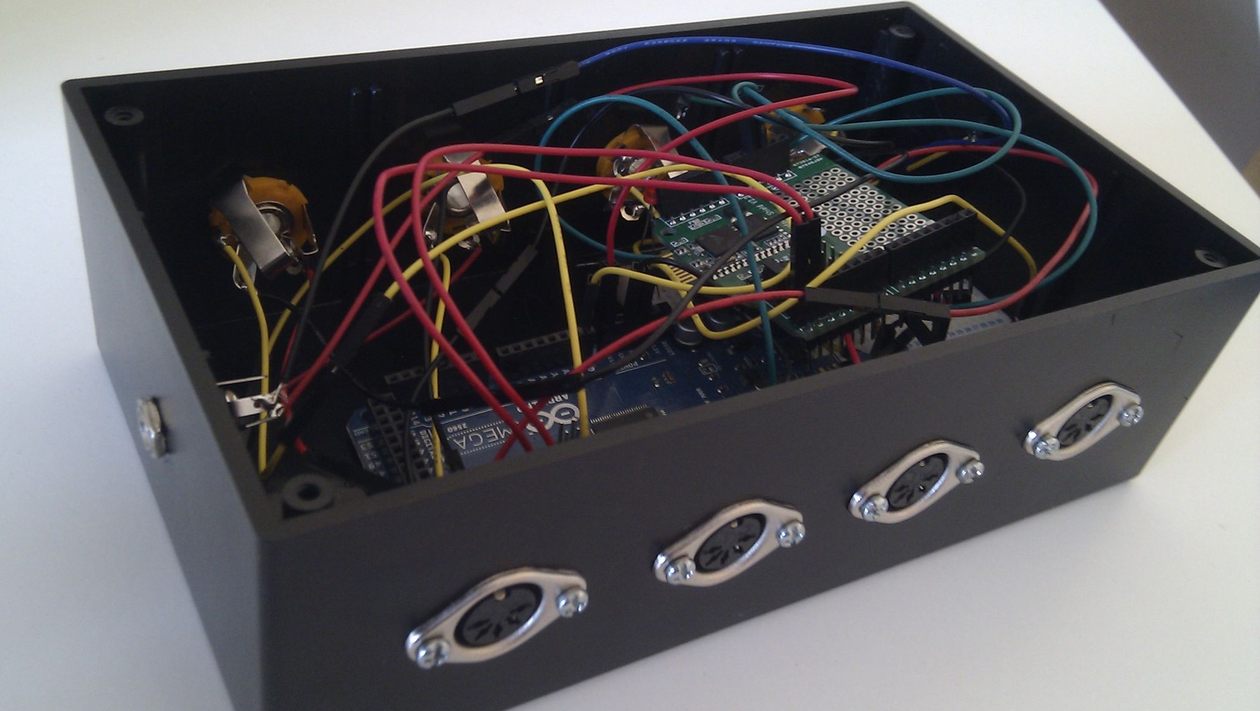
Arduino Bluetooth MIDI - external box and electronics
Right side with 4x 1/4" jacks

Arduino Bluetooth MIDI - Android app
Main screen with buttons to change patch / send MIDI message

Arduino Bluetooth MIDI - Android app
Configure button name and MIDI message in hex / decimal
When playing the keyboard I often find it useful to be able to change patch / voice very quickly eg between a verse and a chorus or perhaps between phrases. Some keyboards have buttons that can be assigned to specific MIDI messages - but I began to run out of these buttons and so looked for an alternative.
I had considered using a laptop with a touch screen and writing a program to send MIDI messages when buttons are clicked / touched. The advantage of this is that I already had a USB to MIDI cable which made that part simple - the disadvantage was the size of the laptop made it slightly less portable than I would like and it would require an extra stand (or some gaffa tape?!) to have it in a usable position during live performances.
A more portable solution would be to use a mobile phone to send MIDI messages – the complication being that mobile phones don't have MIDI output (or didn't in 2012). So the answer was to make some hardware which could communicate with a mobile phone and had a MIDI socket. My phone did not support the Android Open Accessory Development Kit so bluetooth seemed the next logical step.
Since the Arduino has plenty of IO pins I decided to add an expression pedal. The Arduino can read the values from the potentiometer in the expression pedal and output corresponding MIDI volume change (Controller #7) messages - or any other messages I require.
The basic idea was to touch a button and send a midi message. Long press a button to configure its name or midi message. In the screenshot above, midi values preceeded by 'x' are hexadecimal values, otherwise they are decimal values. This is because MIDI implementation charts often show message types in hexadecimal but I thought in decimal when assigning values.
Parts used
- Arduino Mega 2560 R3
- Arduino Bluetooth Shield
- Power Supply
- Sparkfun - jumper wires - I cannot see well enough to accurately solder terminals of this size so I find these wires amazing! They are also useful for prototyping. However, if you are good at soldering then you may feel £20 on wire may seem excessive...
- MIDI socket - Maplin or eBay. Ideally this should be connected with opto-isolators and diodes incase midi cables are plugged into the wrong midi socket. Ensure midi sockets are wired up correctly as they may be connected to expensive equipment. You may consider using an Arduino MIDI Shield
- 6.35mm stereo jack socket - TRS (Tip, Ring, Sleeve)
- Expression Pedal - various makes and models should work. Some have a polarity switch, the power, ground and wiper connections may need to swapped around until it gives the full range of readings.
- Some 220ohm resistors, LED and a breadboard.
- A project box / enclosure - I didn't really think to consider the size of the internal parts of MIDI and jack sockets - but fortunately everything just about fits. I used ABS Box Standard 63x113x197mm - part 2800-325 from Technobots Ltd - but there are plenty of alternatives from Maplin etc. An alternative is to use a 3D printing service to get a specfic size box - this would save time on drilling and filing etc if I was making several.
Arduino MIDI
The Arduino Mega 2560 has 4 serial ports, I used:- Serial - for debugging with serial monitor
- Serial1 - for bluetooth
- Serial2 - MIDI out.
Sending MIDI messages is very easy with an Arduino. MIDI operates at 31250bps so to set the volume of channel 1 to 127 do the following (don't forget MIDI treats channels as 0 to 15 where as some sequencers represent them as 1 to 16):
Serial2.begin(31250); //midi
Serial2.write(0xB0); //controller message on channel 1
Serial2.write(0x07); //controller number 7 (volume)
Serial2.write((byte)127); //value 127
Pedals
Expression pedals can be used to change volume or to alter effects levels eg amount of distortion or wah. Standard foot pedals are often also useful for keyboard players - most often used for sustain but can also be used for eg switching on and off an effect or switching between fast and slow leslie. They could be assigned any number of midi messages eg one pedal could switch off one effect and switch on another or increment a value each time it is pressed. My current version of this project is in a relatively simple form to meet my current requirements but I'm sure lots of fun could be had playing with the possibilities available.Stereo jack sockets used for the expression pedal have 3 pins - known as tip, ring and sleeve (TRS). The pinouts may vary depending on your pedal and its polarity. Some pedals have a separate knob to set its minimum or maximum value.
- 5v
- Ground
- Analog input
Communication protocol:
One option is for every byte of data the Arduino receives on the bluetooth serial port to be echoed onto the midi serial port. But since there is potential to have 4 midi sockets, and the need to control which expression pedal sends which controller message and any other sensor data from the phone eg accelerometer may need to be transmitted, some sort of communication protocol is necessary so that the Arduino knows what to do with the data it receives.The protocol used is simply one byte for the message type - a value of 1 means it is midi data to be output to midi port 1. Another byte for the length of bytes to follow in this message, and then the message itself. After that number of bytes have been read, the Arduino will go back to listening for a message type.
Potential future additions:
- Use other inputs on the Arduino to generate MIDI messages eg ultrasonic range finders, light sensor, switches, potentiometers etc.
- Use other controls in Android to generate MIDI messages eg buttons, sliders, graphical knobs or faders, camera input, accelerometer, touch screen for X / Y graphs.